Airtable
Use Airtable when a team already manages structured data in bases and wants a generated app on top of that workflow.
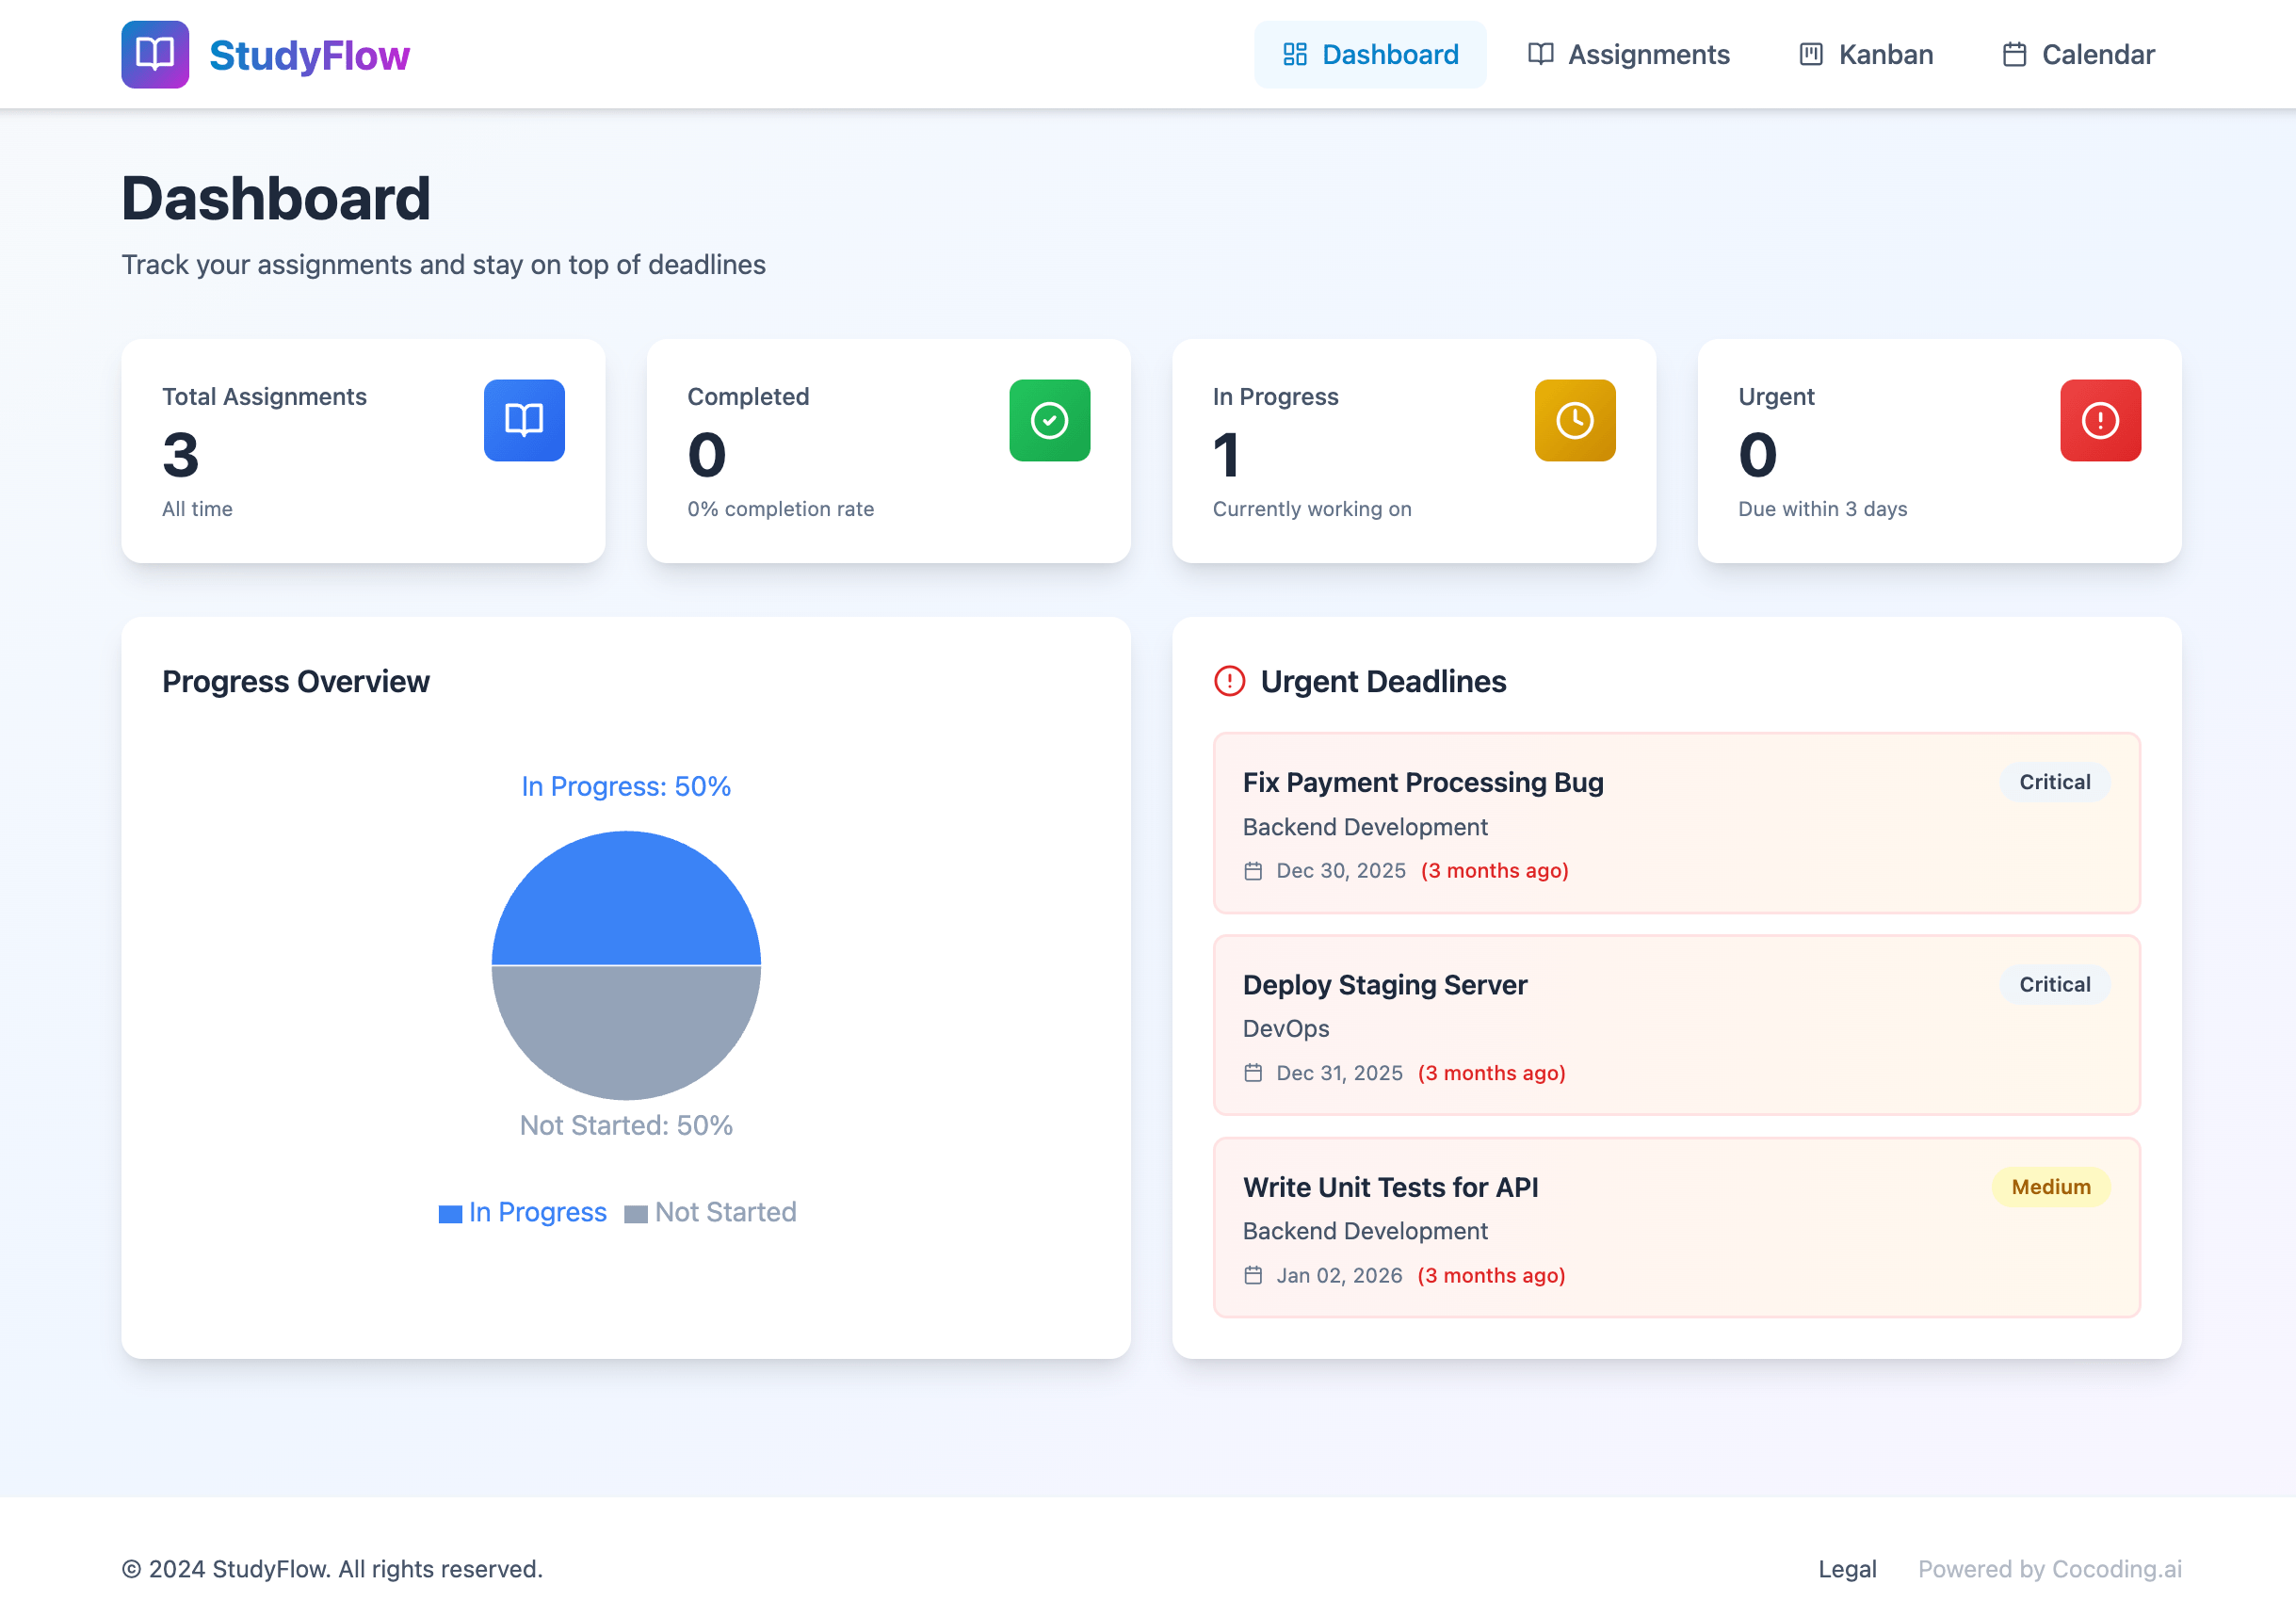
Example app: assignment manager
Build an assignment management app using React, NestJS, and Airtable.
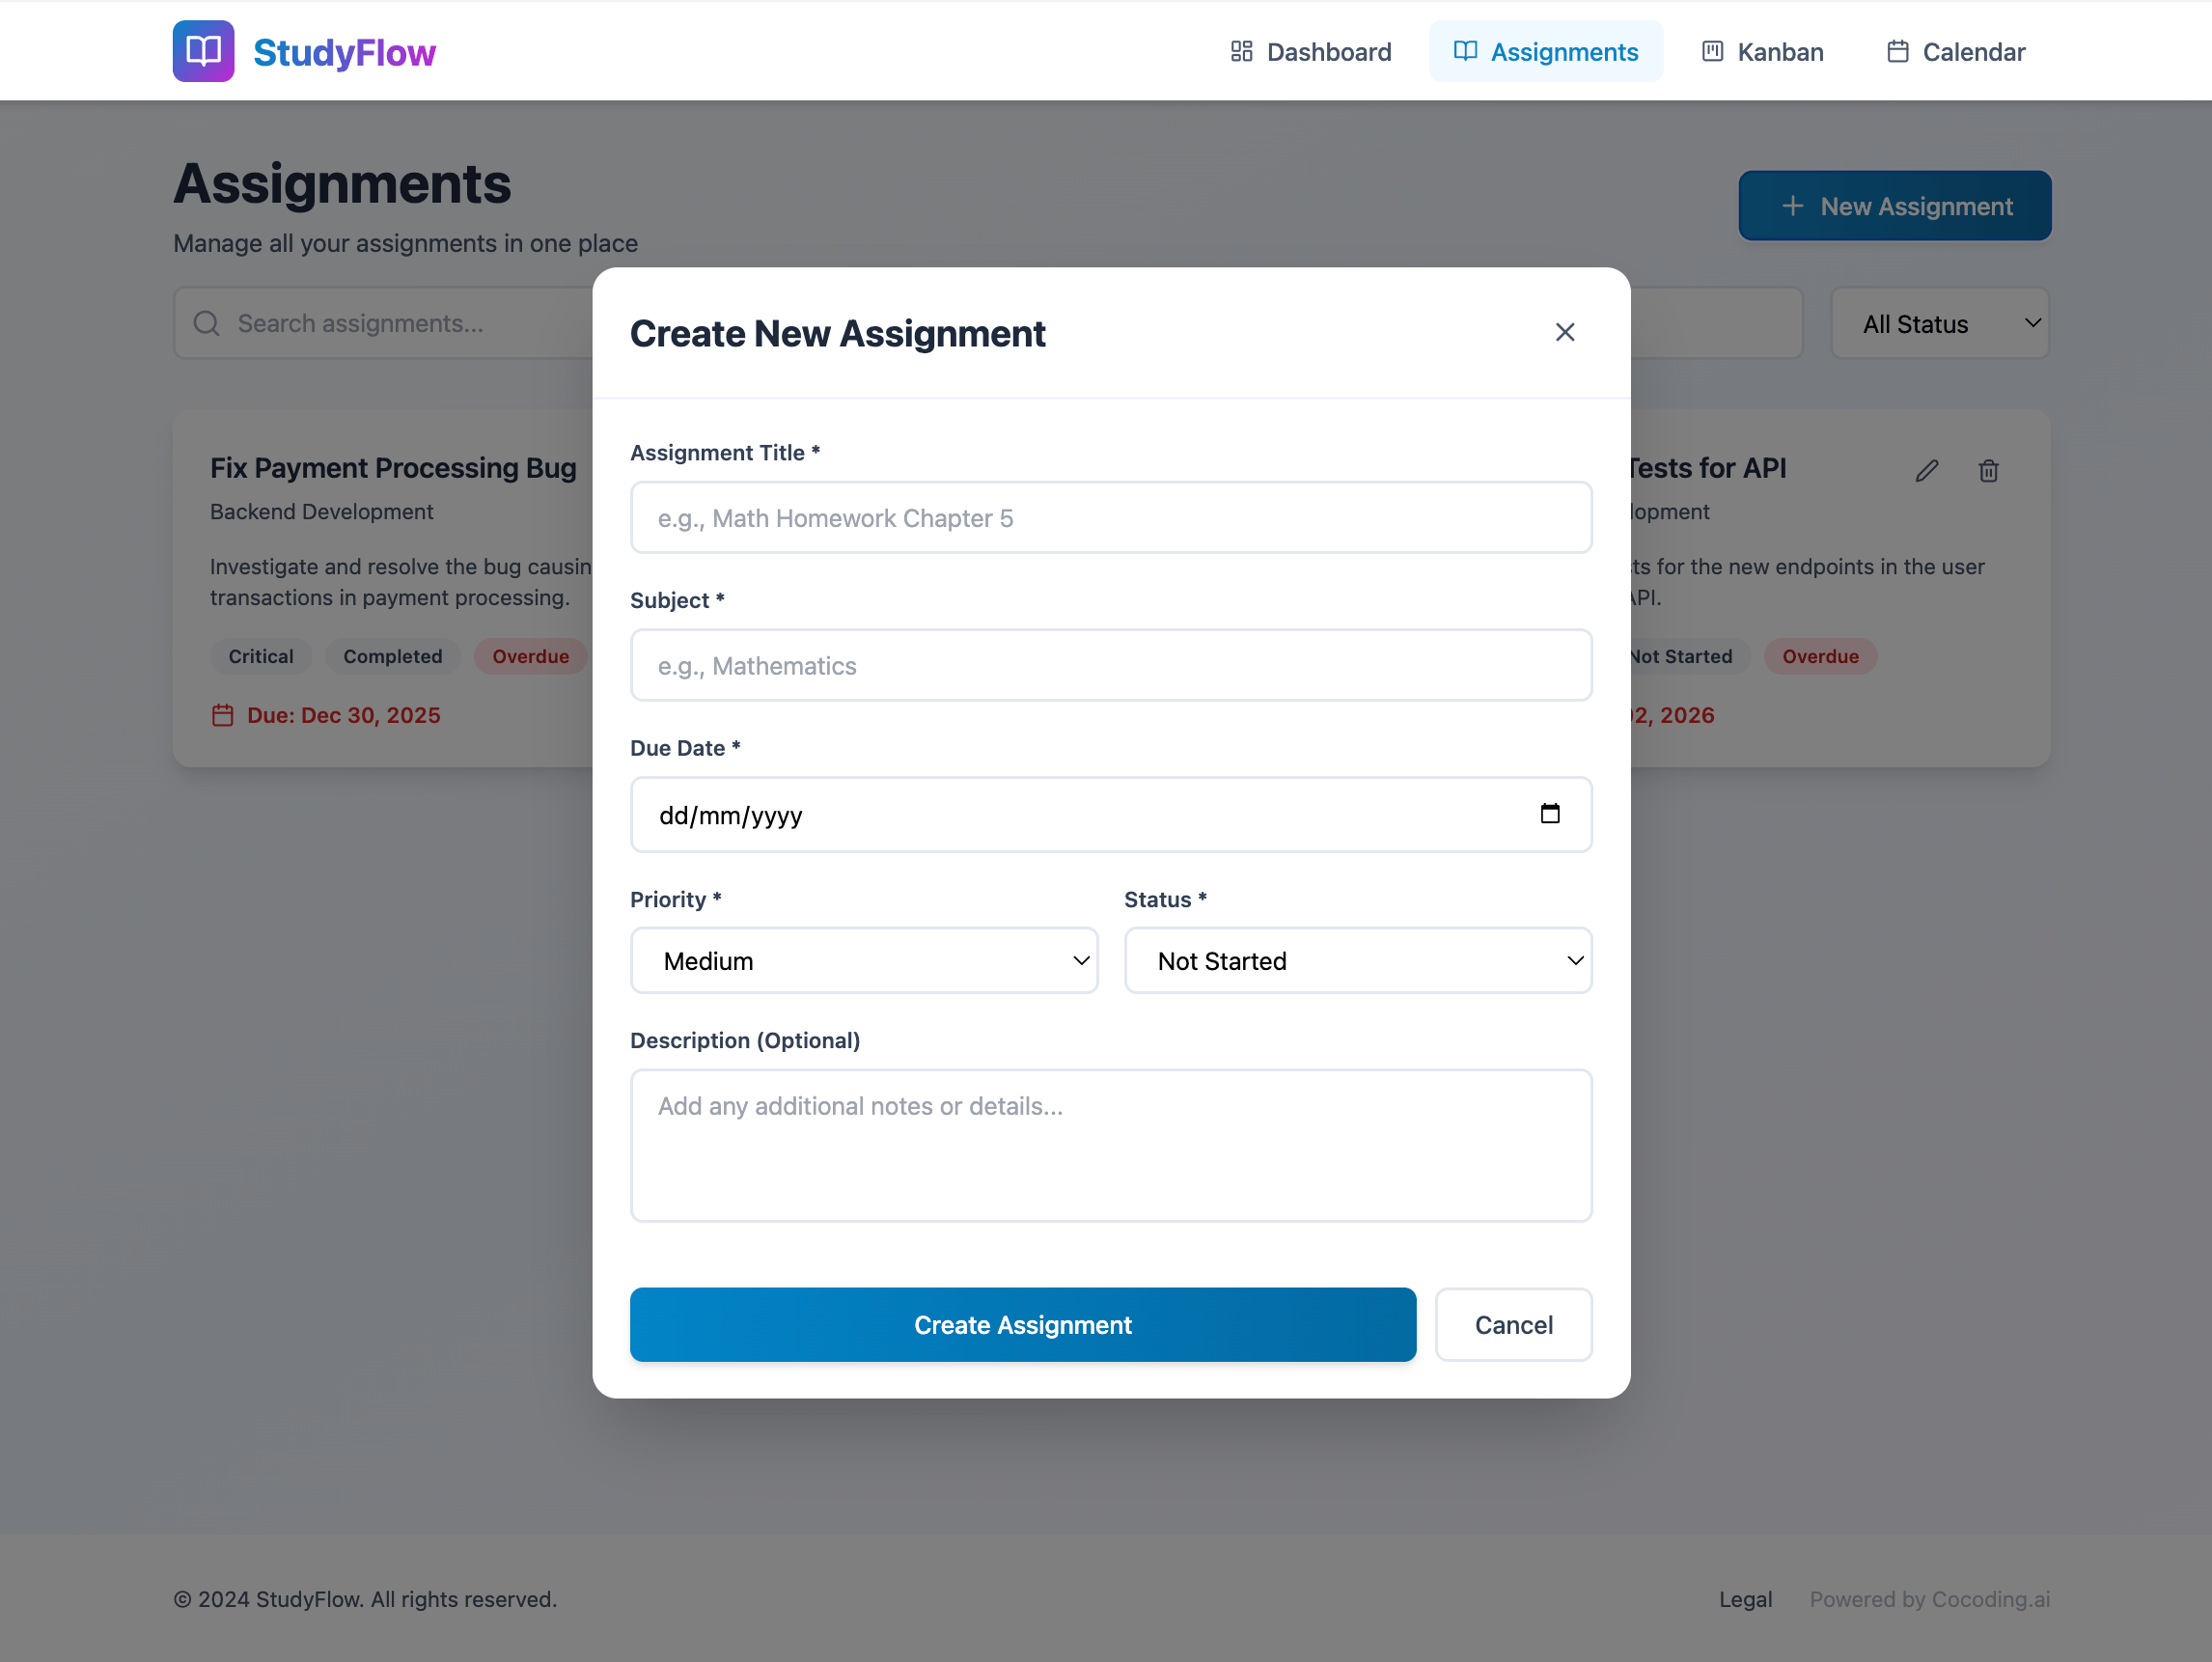
Users can create, read, update, and delete assignments.
Include dashboard statistics, a Kanban board, deadline calendar, search, and filters.
Use Airtable as the data source and keep the token on the server.
Prepare the base
- Identify the base, table, and view the app should use.
- Confirm field names and field types.
- Create a personal access token or approved service token.
- Give the token only the scopes and bases it needs.
- Store the token server-side.

Recommended environment variables
AIRTABLE_TOKEN=
AIRTABLE_BASE_ID=
AIRTABLE_TABLE_NAME=
AIRTABLE_VIEW_NAME=
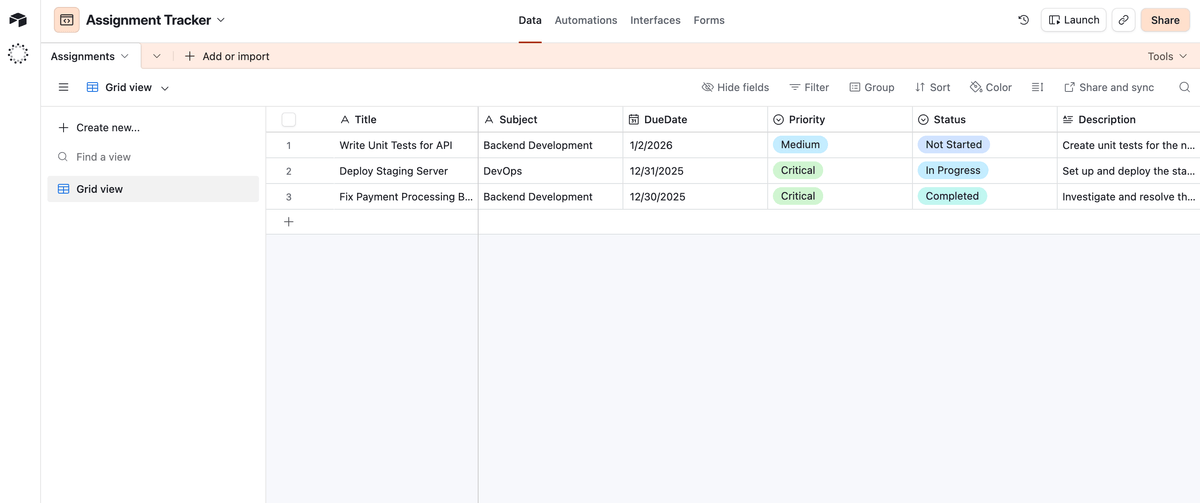
Suggested table structure
| Field | Airtable type |
|---|---|
| Title | Single line text |
| Subject | Single line text |
| DueDate | Date |
| Priority | Single select: Low, Medium, High, Urgent |
| Status | Single select: Not Started, In Progress, Done |
| Description | Long text |
| CreatedAt | Created time |
Column names should match exactly when the generated app maps fields by name.
Prompt Cocoding AI
Connect the project dashboard to Airtable.
Use AIRTABLE_TOKEN and AIRTABLE_BASE_ID on the server.
Read from the Projects table and show status, owner, due date, and priority.
Add a sync error message when Airtable is unavailable.
Test Airtable access
- Add a safe test row in Airtable.
- Refresh the Cocoding AI preview.
- Confirm the row appears with the correct fields.
- Update a non-sensitive field.
- Confirm Airtable receives the update if write access is enabled.
Token setup
- Create a personal access token.
- Select
data.records:read. - Add
data.records:writeonly when the app needs to create or update records. - Limit access to the required base.
- Copy the base ID from Airtable API docs or the base URL.
- Store the token as
AIRTABLE_TOKEN.
Troubleshooting
| Symptom | Likely cause | What to check |
|---|---|---|
| Empty table | Wrong base, table, or view | Confirm AIRTABLE_BASE_ID, table name, and view. |
| Permission denied | Token scope too narrow | Add only the required base and read/write scope. |
| Field missing | Field name mismatch | Copy exact Airtable field names into the prompt. |
| Slow sync | Large base or broad view | Use filtered views and pagination. |